Blog

wood burning fireplace

How Much Will It Cost To Remove Wood Burning Fireplace Insert?

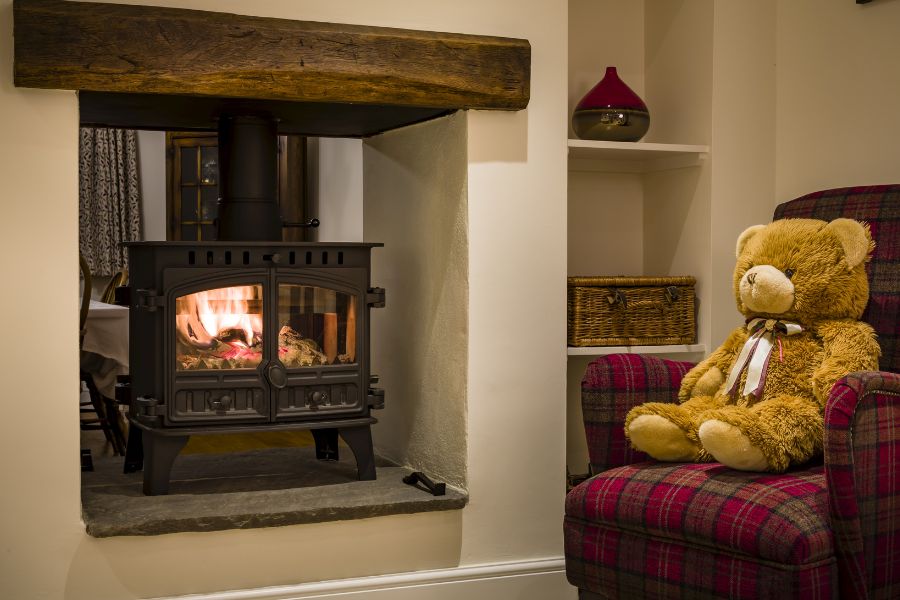
The ambiance and warmth of a wood-burning fireplace in a home is a cherished feature for many. However, there may come a time when homeowners decide to replace or remove their wood-burning fireplace insert for various reasons. The cost to remove wood-burning fireplace insert varies, depending on multiple factors. This article sheds light on these factors to give you a clear idea of what to expect. Learn how to maintain your wooden furniture, pick the right furniture for your kid’s room, and install a water softener here.

Factors Affecting the Cost of Removal

Type and Size of the Insert

The kind of wood-burning fireplace insert or stove you have can influence the removal cost. Steel inserts are generally lighter and easier to handle than their cast iron counterparts.

Furthermore, the size and weight play a significant role as more extensive and heavier inserts require more manpower and equipment.

Complexity of the Installation

Every fireplace insert, be it a simple wood-burning stove or a more intricate wood-burning fireplace insert, is unique in its installation. Some might be bolted securely, others might be custom-fitted, and the venting mechanism varies. The more complex the initial structure, the more complicated the removal process might be.

Condition of the Fireplace and Chimney

The current condition of your wood-burning fireplace and its accompanying chimney could contribute to the complexity and cost. If the fireplace or chimney has aged or deteriorated, you may need to take additional precautions or steps for safe removal.

Location and Accessibility

Removing a wood-burning wood-burning stove from the ground floor might be less labor-intensive than a fireplace insert in a multi-story home. Accessibility plays a significant role in determining the ease and, consequently, the removal cost.

Local Labor Rates

The area you reside in can significantly influence the removal costs. There might be competitive rates in areas where wood-burning stoves and fireplaces are more common.

However, in regions where gas fireplaces dominate, professionals with expertise in wood stoves or fireplace insert removal might charge a premium. This is due to the specialized nature of the job.

What are the Potential Additional Costs?

Chimney Cleaning and Inspection

After removing a wood stove or fireplace insert, a thorough chimney cleaning is often necessary. More so if you’re planning to transition to a gas fireplace. That’s because the residues from wood burning interfere with the efficient functioning of a gas fireplace insert.

Repair and Restoration

Fireplace removal costs may not always include post-removal restoration. Depending on the condition and age of your old wood-burning stove or its surroundings, there might be a need for masonry repairs, repainting, or aesthetic touch-ups.

Disposal Fees

Properly disposing of an old wood stove insert or other fireplace inserts might incur additional charges. Especially if they are large or made of materials requiring special handling, like metal chimneys.

Replacement or Conversion

Transitioning from a wood-burning setup to a gas fireplace insert may also have associated costs. This might involve purchasing the new unit, installation fees, and any required structural adjustments to accommodate the new insert.

Partial Removal

In some instances, homeowners might opt for partial removal, where certain components of the fireplace or chimney serve aesthetic or functional purposes. This could alter the standard fireplace removal costs.

What’s the Average Cost to Remove Wood Burning Fireplace Insert?

Fireplace removal costs can vary considerably based on the factors previously discussed. On average, here’s a rough estimate:

Typically, removing a standalone wood stove might range from $200 to $500, depending mainly on its size and location.

For inserts integrated within a fireplace, costs can fluctuate between $300 to $800. The variation considers the complexities of the insert design and how it fits into the fireplace.

Given the potential intricacies of detaching and disposing of a metal chimney, the cost to remove such setups might be between $600 and $1,200.

Suppose your removal is part of a transition to a gas fireplace. In that case, you’d also need to factor in the purchase and installation of the new unit, which can range from $2,000 to $5,000 or more. But this hinges on the model and specific installation requirements.

Average Costs for Removal Other Fireplace Inserts

Navigating through the myriad of fireplace and insert types can be daunting. Besides, the costs differ significantly based on the kind and intricacy of the unit and its installation.

Here’s an estimate:

Wood Burning Insert Removal

Removing a wood-burning insert from a standard fireplace can range between $300 to $800. This accounts for the complexity of detaching it and keeping the fireplace intact.

Gas Line and Wood Fireplace Removal

The safe disconnection and capping of the line for fireplaces connected to a gas line may also attract extra charges. Removal in such cases hovers around $500 to $1,000.

Electric Fireplace Inserts

As these are generally easier to remove with fewer complications related to venting or gas lines, the price ranges from $200 to $600.

Partial Fireplace Removal

If you only want to remove a specific portion of the fireplace, like the chimney stack or the chimney breast, costs range from $500 to $2,000. This service depends on the size and structural challenges.

Complete Chimney Demolition

Taking down an entire chimney, including the flue and outer stack, is a substantial task. Considering the height, location, and material, this may cost anywhere from $2,000 to $6,000.

Chimney Flue Removal

Considering the flue’s complexity and size, if you only want to remove the chimney flue without disturbing the rest of the structure, costs can range between $500 to $1,500.

It’s essential to keep in mind that these are ballpark figures. Always obtain detailed quotes tailored to your specific situation for more precision and to better understand the costs.

Benefits of Professional Removal

Safety First

Fireplaces and chimneys have various safety considerations, whether associated with a wood fireplace or a wood-burning insert. Professionals keep the gas line, if present, adequately disconnected. That way, there’s no risk of structural damage during removal.

Efficiency

Professionals have the right tools and knowledge to expedite the process. Whether dealing with an electric fireplace insert or a complete chimney demolition, they do the job efficiently.

Avoiding Potential Pitfalls

A layperson might not know the structural significance of certain parts of a fireplace or chimney. Professionals guide decisions, like opting for partial fireplace removal or a more comprehensive approach.

Cost-Effectiveness in the Long Run

While hiring professionals might seem like an added expense, it saves you money in the long run. It protects you from mishaps, potential structural damage, or the need for further repairs.

So, What If I Want To Try DIY?

That’s not a problem. However, embarking on a DIY project requires careful consideration, especially for something as intricate as removing a fireplace or gas insert. Note these few tips:

Safety Concerns

The first and foremost concern when considering a DIY removal is safety. Gas inserts, in particular, are connected to gas lines, which, if not correctly handled, pose significant dangers.

Knowledge and Expertise

Removing a brick fireplace or gas insert is not just about physical labor. Understanding the structure, the venting mechanisms, and other intricacies requires a certain level of expertise.

Tools and Equipment

You’ll need specific tools and equipment for easy removal, especially when dealing with stainless steel liner components. Purchasing or renting these tools can be an additional cost.

Disposal

One of the often overlooked aspects of DIY removal is disposal. How will you remove the brick, mortar, or old gas insert? Disposal costs can add up, especially for bulky or hazardous materials.

Potential for Additional Repairs

Mistakes or oversights during a DIY removal lead to additional repairs or interventions. A botched stack removal might require you to hire professionals to fix the damage, incurring extra costs.

Tips for Reducing Removal Costs

Wood burning fireplace and logs of wood

If you’re looking to mitigate some of the expenses associated with removing a fireplace or insert, consider the following:

Obtain Multiple Quotes

Always shop around and get quotes from multiple professionals. This gives you a clearer picture of the market rate and allows you to negotiate.

Combine Projects

If you’re considering renovating or making other changes to your home, combining projects might fetch you a bundled deal, reducing individual costs.

Off-Season Removal

Professionals often offer discounted rates during off-peak seasons. Consider scheduling your removal when demand for such services is low.

DIY Disposal

While the removal might be best left to professionals, you could consider managing the disposal yourself, especially if local regulations and facilities allow it.

Sell or Recycle Components

Some components, especially those in good condition, like stainless steel liners, might have resale value. You may sell or recycle them to offset some of the removal costs.

DIY Stack Removal

If you’re confident in your skills, handle simpler tasks like stack removal yourself and leave more complex aspects to professionals.

Summary

Removing fireplaces or inserts, while seemingly straightforward, entails many considerations ranging from safety to disposal. Whether opting for professional services or taking a DIY route, you should be well-informed and prioritize security and structural integrity. Good luck!

Installing a Solar Attic Ventilation – Pros and Cons

The summer season brings the heat with it, and a hot home is no fun, both during the day and at night. While you may consider using your air conditioner more, there are alternative ways you can tackle the issue of heat while spending less on energy bills. Attic ventilation is one way to get rid of the surplus heat and maintain a cool temperature in your home.

There are two significant ways to provide attic ventilation. First, you can install a solar attic fan or roof vents. These ventilation options are not yet popular among the public, but maybe that’s because they don’t understand how they work. This article will be discussing why they are essential and some disadvantages that come with their usage.

Why Should You Minimize Humidity and Heat in your Home?

In hotter regions such as Florida, the heat and humidity can be a menace. How do you think this will affect homes that aren’t equipped with air conditioners, proper insulation, or attic ventilation in places like this? Firstly, the attic space in the home traps the heat from outside; from here, it enters the rest of the building. Even in homes that have air conditioners, they will have to work all-day round to keep the house cool, which means higher energy bills.

When heat enters a home unchecked, it can ruin your home’s insulation, trigger fungal decay, damage your roof and even delaminate plywood. This is what attic ventilation options such as solar attic fans can help prevent. An added benefit is that their energy source is the sun, which is free. So it’s about time you know the benefits of using solar attic fans.

Pros of Installing Solar Attic Fans

1. Reduces Humidity in the Attic

Humidity is a consequence of heat, and this creates the perfect breeding ground for living organisms such as mold and fungus. The presence of these in your home can be detrimental to the structural support of your building. Having a solar attic fan minimizes humidity and prevents these organisms from growing.

2. Energy-Efficient and Affordable

The solar attic fan is powered by solar energy which is sourced from the sun. Since your energy source is free and sustainable, you don’t have to worry about rising utility bills. These fans are also affordable to use because maintenance isn’t required. It’s also easy to install. This makes it a good investment.

3. Eco-Friendly Energy

Since they utilize solar energy, they are eco-friendly. Unlike air conditioners that release emissions into the atmosphere, solar attic fans lower your carbon emissions into the environment.

Cons of Installing Solar Attic Fans

1. They are More Expensive than Conventional Fans

This is only in terms of their upfront cost. However, what you spend purchasing them will be eventually recovered many times over through the energy you’ll save in the long run.

2. One Fan Hardly Does the Job

One solar attic fan cannot eliminate the excess heat in your home. This means you have to get two fans.

Kids Room Furniture – How Save Are Beanbags?

Beanbag chairs have been a staple feature in nurseries, playrooms, and children’s rooms for a long time. Bean bag chairs are also commonly used as flexible seating options in classrooms. They are fun, can be cute, and are entirely versatile. They do not have any sharp edges or hard parts that could typically make furniture dangerous for children. However, it is not wrong to wonder if beanbags have their downsides despite appearing as the perfect safe object to sit on and play with. If you are wondering, then let’s spill the beans!

How Are Bean Bags Made?

In many urban settings, beanbags have become the popular option for luxury seating, with the upside of them not being as expensive as any other luxury furniture. A bean bag is essentially a sack-like piece of furniture filled with dried beans, polystyrene, PVC pellets, and sometimes, foam beads.

Of course, the sizes of the beads differ and usually indicate the quality of the bean bag. The beans are typically very tiny, and most times, they measure as small as a millimeter in diameter. Bean bags are made with an outer cover lined with an inner layer of fabric. The lining layer is only opened when beans want to be either removed or poured into the bean bag.

Are Bean Bag Chairs Safe or Not?

Many parents don’t realize how shockingly easy it is for little humans to experience suffocation. Sometimes, when children sleep on a soft or curved surface like a bean bag, it so happens that they assume a position in which their chins tightly rest on their chest. This position, if not changed, can lead to suffocation.

kid rests on bean bag

Anyone who has spent time with children would know that they are quite the nosy and curious bunch. From tugging, biting, pulling, and scratching, children never really stop their curious ways, especially when it’s on an object as fascinating as a bean bag. The hazards that could be associated with bean bags include the following:

Suffocation

When it comes to children and their use of bean bags, suffocation is the prime cause of dangerous incidents. This can happen in many ways, such as the child finding a way to unzip the bean bag and then climb inside it.

This particular reason is why many bean bag brands label their products with warnings stating that kids under a certain age should not sleep on bean bags. As a parent, you should heed that warning. While your kids might love playing on the soft, squishy bean bag chair, it is not worth risking their safety.

The toddler could also suffer suffocation if the bean bag is not filled correctly, leaving the toddler with inadequate support to the head and neck. As scary as it might sound, there could be cases of children crawling underneath a beanbag chair. This could end badly if they stay there for way too long or if someone else sits on the bean bag.

Swallowing

Children are known for their curious ways and can quickly locate a visible enough zipper on the bean bag. When they do, they may find that the fillings of the bean bag chair are fascinating enough to ingest. This can cause numerous complications if not addressed quickly and sufficiently.

Inhalation

After unzipping or, in some cases, tearing or poking a bean bag, a child could make the costly and unknowing mistake of inhaling the beads inside the bean bag. While this has not been noted as a leading hazardous possibility with bean bags, inhaling the chemicals and dust from the polystyrene beads can lead to irritation, coughing, nausea, headaches, and dizziness.

Safety Precautions You Can Take

Bean bag chairs are fun, exciting, and cozy. Their soft and comfortable nature can be therapeutic to the body. However, for the safety of your kids, avoid allowing children to sleep on bean bag chairs or any other soft surfaces at all.

If you put your child in a bean bag chair, make sure that the chair is firm enough to prevent suffocation. In addition, get bean bags that are small enough to fit their size or wait till your children are old enough or big enough.

To prevent potential bean bag chair hazards, restrict the bean bag chair from any sleeping or napping sessions. The bean bag should be used only for sitting and playing, and you should discourage kids from sitting on a large adult bean bag,

Bean bag manufacturers worth their salt knows that safety precautions are essential.

When searching for the perfect bean bags for kids, it is best to look out for certain features. These features include a very important double zipper for the inner lining layer, serving as a solid foolproof anti-curious kid mechanism.

Good bean bags are also made of tear-resistant material to prevent any poking or prodding kids’ hands from getting access to the beans. In addition to that, you can keep children safe by preventing them from lying face down on the bean bags. Ensure the filling is nice and sturdy enough to support the weight evenly. Even with all of these, nothing beats safety measures other than actively keeping an eye on them. There’s plenty to watch out for when taking care of kids. This is a great place to start!

Easy Move-Out Cleaning Checklist to Get Your Deposit Back

Your move-out cleaning checklist should include details such as using a vacuum on your floors, using a scrub to clean your toilet, sink, and bathroom, cleaning inside your closets, cleaning inside your kitchen cabinets, wiping down appliances, and more.

As a tenant, it’s almost certain that you will move out at some point. Usually, when leasing a house, a security deposit is part of what you pay to your landlord. So when you want to relocate, leaving that apartment in excellent condition is one sure way to get that security deposit back from your landlord.

To do this, you will need to create a move out cleaning checklist or hire a cleaning service or company- whatever works best for you. This article will discuss in detail what should be on your move-out cleaning checklist and the cleaning supplies you will need.

What Should Be on My Move-Out Cleaning Checklist?

Listed and discussed below are the elements of a thorough move out cleaning checklist:

Take Out Any Personal Belonging of Yours

To leave the apartment in the same state you rented it, it’s essential that you remove every personal property. It can be your wallpaper, other removable decor additions, furniture, shelves, cupboards, or coffee tables.

Clean the Floors and Carpets

Use a vacuum or broom to clean your floors. In the process of cleaning your floor, don’t leave out specific areas in the house, such as the stairs, closets, and nooks. You may even need to think about hiring a professional carpet cleaning company. While you are already in the cleaning process, we recommend having your rugs cleaned before moving.

Wipe and Dust Every Surface

You can use a surface cleaner with a cloth or paper towels to clean the countertops in the kitchen, the shower, the windows, the mantles of your fireplace, bookshelves, and other surfaces in the apartment.

Clean or Wipe your Appliances

This should undoubtedly be on your move out checklist. After some time, the appliances in the apartment will have a lot of markings and fingerprints.

Before moving out, make sure you use baking soda or a mixture of water and vinegar to wipe or clean your fridge, microwave, and other household pieces of equipment. Also, pay attention to possible food stains in your fridge and microwave.

Clean your Cabinets

During your cleaning exercise, include your cabinets as well, especially the ones in your kitchen, because they’re most likely to have debris, food crumbs, and residues from groceries and other ingredients.

Clean Fixtures such as the Sinks, Toilets and the Showers

This should be the next thing to clean when you are done vacuuming and cleaning the floor. All the faucets, bathtubs, showers, and toilets should be scrubbed clean. Doing this will eliminate soap scum, rust stains, mold, and mildew and make the bathroom look as good as new.

Clean the Closets

This is another fixture to pay attention to. Once you have removed all your clothing items, begin sanitation in your closets and their consisting parts. If it has drawers, make sure it’s all good in there. Dust the hanging rod and use a broom to sweep the floor of the closet. Most closets come with mirrors. Your cleaning should not leave out the mirrors.

Remove Wall Anchors, Hooks, and Nails

Before you move out, remove any attachment you’ve been using to hang stuff on the wall. Unless the landlord or the new tenant request they remain there, ensure you remove them.

To not cause any damage while removing nails from walls, follow the tip in the video below:

Cover any Holes on the Wall

After removing nails, anchors, or hooks from the wall, there will be holes on the wall, and you should cover them before handing over your apartment key. You can do it yourself or hire a handyman to execute the task.

Cover Scratches or Markings on the Walls with Paint

Purchase some paint that aligns with the color of your walls. If you have more than one color painted on your walls, get the number of paints needed. Use the paint to cover up markings on the walls. Focus more on areas with high-gloss paint because they tend to get scratches and markings easier than walls with matte finishing.

Oven and Stovetop Cleaning

move-out oven cleaning

The stovetop is one of the places in the kitchen where you’ll likely find hidden food residues. Remove the top part of your cooker and clean beneath your burners. Mix baking soda with water and use it to clean your oven. You can also sprinkle the mixture into your oven.

Mop the Floor

After vacuuming and dusting everywhere, round up your cleaning by using a mop to clean your floors. Use warm water and vinegar for mopping. Alternatively, you can use a wet cloth to wipe the floors. This gives your flooring a squeaky clean appearance before you move out.

Ensure the Ceiling and Doors are in Excellent Shape

It will be inappropriate to move out when you have a sagged ceiling, or it probably has some holes. Check every door in the house to ensure that they’re functioning correctly. Also, check every room in the house to ensure that they’re in good shape.

Is It Necessary to Hire a Cleaning Service?

Many people prefer to go for professional cleaning services rather than do the work themselves when they want to move out. Professional cleaning is not a bad idea, especially if you’re after that security deposit.

Getting your house cleaned professionally gets the job done more efficiently. There are spots or places you might miss out on while cleaning. It’s either that or they won’t be adequately cleaned.

But then, if you’re on the budget and you want to save money as you move out, doing the cleaning yourself is the preferred option.

Most people go with the first option (hiring a cleaning company) when they decide to move out, probably due to a busy job or a big family. Also, it can just be that they simply don’t have the time.

The best time to begin the cleaning is after you’ve moved out all your personal belongings in the house. You can thoroughly look after fixtures like your doors, windows, and bathroom in the cleaning process.

How to Maintain Your Wooden Furniture

Wood furniture is naturally sturdy and robust. Such material could last years of usage, especially if you are taking care of it the right way. We have some valuable tips here to help you maintain your wooden furniture and keep it alive twice as its expected lifespan.

1. Be Particular With Room Temperature

Your furniture should not be placed in an area with direct scorching heat. Heat exposure should be limited if you want to keep your decorations looking good for a longer time.

Also, excessively cold objects should not be placed on wood surfaces without protection. It could leave dents and marks that will ruin the natural beauty of the wood.

2. Oil and Wax

One way to keep your wooden materials shiny and good as new is to wax or oil it regularly. The coat you apply will not only shine the surface, but it will also serve as an additional layer of protection from debris that could ruin the wood quality.

3. Dust your furniture well

Do you think dusting does make that much impact in keeping wood objects alive? Well, it’s about time you know that it does help a lot in making sure that wood stays fresh and valuable.

Dusting furniture keeps the wood from being dulled-out. It also leaves the material sparkling and gorgeous.

Final Thoughts

Now that you know how to take care of wood furniture, we are sure you will make the most out of these materials.

Furniture Trends that are Big Hit in 2020

2020 may not have been a good start, but don’t stop it from remodeling your home. This is the best time for you to consider improving your standard of living. We know you have all the time you need to be hands-on about it. You take care of your time; we take care of the ideas.

Check out our list of must-have furniture you must acquire for a better home:

1. Oak Materials

Oak materials are rich and fine. It will definitely revamp the outdated setting you used to have. Using oak furniture will bring a sleek touch to your home.

2. Bold Contrasts

Minimalistic or not, you should at least try using bold colors to emphasize your house’s features. You do not have to be afraid of strong and bright patterns and colors anymore. Incorporate it with a great equalizer background color, and you will have an artsy ambiance.

3. Vintage pieces and furniture

We know we are now in the modern era, but have you seen how well antique pieces go with trendy settings? You should not miss its classy touch and vintage feels.

4. Symmetrical and Asymmetrical patterns

This trend is definitely fresh and good for the eyes. You’ll be amazed how shapes can do great illusions in your home interior—a perfect definition of unique.

Final Thoughts

These are just ideas we compiled for you. You should always choose a setting and interior you are comfortable with. Just make sure to always choose the best quality of the materials you use.

Age of COVID-19: The Best Time to Remodel Your Home

We understand that this time of year is just filled out with insecurities and anxieties. However, it should not stop you from creating a better home space for you and your family. Here are the reasons why:

1. It Prioritizes Cleanliness and Order

The world is becoming more and more uncertain. Isn’t it best to make your home your safe place? It’s time to fix those problems and issues through remodeling.

2. Hands-on Professionals

The pandemic is sure to affect the economic growth of the world. It means a little fewer projects for interior designers and workers. Due to that, you are sure that the professionals you hire to help you prioritize whatever it is you need to be done.

3. Time to Create Private Rooms

While we still are not yet back to normal, we must have private rooms to do our meetings and classes without hassle and interruptions.

Final Word

As you plan your renovation attempt, don’t forget to consider protocols and safety precautions on top of everything else.

Coffee Tables

1. Dark Japanese Brown Patina Steel Top Coffee Table

A rustic yet modern piece of furniture. A beautiful dark brown color which looks could stand out. This table was heated before applying the patina to create its dark and marbled appearance.

2. Rosewood Patina Coffee Table

They are delicately designed to end up with a deep and natural touch. The raw steel will be slightly visible over the patina, making it distinctly look natural with colors gracefully combined.

3. Fire Patina Steel Top

A beautiful blend of yellow and reddish-brown color that mimics fire on your table. It is made interesting by its frame style that matches its patina color—a strong piece.

4. Japanese Red patina with Light Shou Shugi Ban

A mixture of yellowish-brown and dark red Japanese patina heated to exhibit the dark marble look. A coffee table that will look like a traditional Japanese art seems like a catch.

5. Mixed Patina Steel Top Coffee Table

A patina with a steel framework that defines modern and antiquated all at once. A reddish-brown marble finish with the sturdiest support from the steel material used. The mixture of hues creates a depth and style that is unique—a rustic yet modern touch.

Decor Products

1. Steel Pipe Toilet Paper Holder

If you aim for an overall contemporary or antique setting, you cannot miss out on a detail in your home, not even the paper towel holder. A steel holder attached to a gorgeously patterned wood will complete that sophisticated bathroom look.

2. Steel Pipe Towel Rack

An elegant decor where you can place your bathroom towels. You will no longer feel your towels messing around the style you have worked hard to achieve because there’s now a place for these things to look entirely lovely and organized. This will also look good with the tissue rack.

3. Large Wood Crate

In need of a bookshelf or case, but you don’t want enormous and giant cabinets to take up the whole space? A unique wood crate may be something you want to consider. You will have ample-sized containers for the stuff you want to keep intact. At the same time, you can place it anywhere, looking fab without taking a lot of areas and causing your home to scale-down.

4.Tiny Wood Crate

We also have a wonderfully designed wood crate in a smaller size. You can put your condiments and utensils here to complement tables and kitchen.